Express Appliance Repair provides:
 ExperienceLicensed technicians with over 25 years of experience
 WarrantyFull warranty
 ExpertiseLicensed technicians unrivaled in experience and customer care
What started as a manufacturer of small household appliances soon grew into one of the most respected names in the industry. Kenmore refrigerators, dishwashers, ovens, and other products have become increasingly popular and desireable over the years which has allowed the brand to continually expand and grow. Such high-quality appliances deserve the very best in terms of repairs and maintenance. At Express Appliance Repair, our technicians are fully-trained and experienced in performing Kenmore appliance repairs. We are available 24/7 and our same day service means that your appliance will be restored to working order before you know it! Don’t settle for anything less than the best. Contact our expert team on (647) 492-7773 for reliable Kenmore repairs.
When your Kenmore refrigerator, stove, or washer breaks down, you might frantically wonder who to call. Not all repair services are available 24/7, and they might not be able to tend to your repair needs that day. At Express Appliance Repair, we understand that appliances break down when you least expect, and at the most inconvenient times. Our 24/7 same day service ensures that you’ll have your appliance back up and running sooner rather than later. Apart from our speedy service, we also cover all of our Kenmore appliance repairs with a 100% satisfaction guarantee. We believe in efficiency as well as making sure that every customer is completely happy with our work.

Your refrigerator is responsible for keeping food, both cooked and uncooked, fresher for longer. Of course, if your fridge is not cold enough or if the motor fails completely, your food will spoil sooner than it should. When you need fast Kenmore fridge repairs, call Express Appliance Repair. We live up to our name by providing 24/7 same day repair services throughout the Greater Toronto Area and we will have your fridge up and running before you know it!
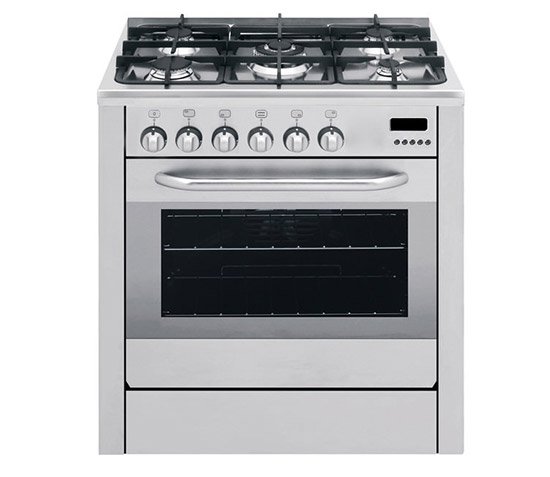
Whether a single hot plate or your entire stove gives you trouble, it’s important to seek professional assistance sooner rathe than later. Not only could the fault prove dangerous but it will also make cooking difficult or impossible. Not to mention expensive if you plan on ordering in! For reliable, professional Kenmore stove repairs, contact our team of trained experts. All stove repairs are covered by our 100% satisfaction guarantee for your peace of mind.
Dishwashers take the backache out of doing dishes. Without one, however, your cutlery and crockery sure can pile up! If your dishwasher is leaking, making some kind of strange noise, or simply not performing quite as it should, contact us right away. We are available 24/7 for all Kenmore dishwasher repairs, and our team will arrive prepared to perform repairs on the spot. Remember, we offer same day service throughout the Greater Toronto Area!

Imagine having to do laundry without your washer! Scary thought, isn’t it? Well, this is the kind of fear that many consumers feel when their washer starts leaking or does not turn on. No matter the fault, our team will be right over to diagnose the problem and perform speedy Kenmore washer repairs. Not only do we offer same day service but we also come prepared with tools and parts to complete repairs right away.
Whether your dryer is running too hot, not getting warm enough, or you notice any other problem, it’s time to call Express Appliance Repair. We offer same day Kenmore dryer repairs throughout Toronto, and our team will come prepared to perform repairs on the spot. Our 100% satisfaction guarantee also ensures that you are not only provided with fast service but also quality repairs. Don’t settle for less; your Kenmore dryer deserves the best!
When your oven does not turn on, or you notice temperature control issues, it’s best to avoid using it until professional repairs have been completed. In order to avoid any delays, call us for same day Kenmore oven repairs. Our technicians are available 24/7, and we will diagnose and repair your oven on the spot so that you can get back to cooking that feast! No matter the problem or model, our oven repairs are all covered by our satisfaction guarantee.
Whenever you buy a new appliance, you want it to last forever. Sooner or later repairs will be necessary, but this does not mean that you should settle for less than the best. For professional Kenmore appliance repairs in your area, contact Express Appliance Repair. We are available 24/7 for your convenience.
These error code explanations can help you diagnose a problem with Kenmore dishwashers with a model number that begins with 665, which is the Voyager series.
| Error Code | Condition | Check/Repair |
| Clean light blinks 7 times | Heater circuit failure. Control didn’t detect the expected rise in water temperature when the heating element was energized to heat water during the cycle. | Check the heating element and related components (wiring and control board) in that circuit |
| Console light blinks rapidly | The control detects a stuck button on the control panel. | A failed control panel or a bad electronic control board can cause this code. Check the buttons on the control panel using a volt/ohm meter. In most cases, the control panel needs to be replaced. |
| Start/Resume light blinks slowly | If the dishwasher door is opened or power is interrupted during the cycle, the dishwasher won’t start again until the door is detected as closed and the Start/Resume button is pressed. | Check the door latch and switch assembly. A failure in the Start/Resume button also can cause this problem. |
| Clean light stays on | The dishwasher won’t start a new cycle unless it detects that the door opened after the previous cycle. | Turn off power to the dishwasher by shutting off the breaker and restarting. If that does not work, the door switch assembly is stuck and must be replaced. |
| Control lock LED is on but not accepting key presses | Accidentally turned on or control detected keypad problem. | Press the Heated Dry key for 5 seconds to turn off control lock feature. If that doesn’t work, replace keypad. |
| Sanitized LED blinks at end of cycle | Control could not confirm Sanitation achieved. | Check voltage to the dishwasher and the temperature of incoming water. Check the diverter motor, the heater and the OWI/thermistor |
Disclaimer: please make sure to unplug your appliance if you feel that it is malfunctioning. Consult with an Express Repair professional to prevent any further damage to your appliance.
These error code explanations can help you diagnose a problem with your Kenmore HE dishwasher.
| Error Code | Condition | Check/Repair |
| 1-1 | The electronic control board detects a stuck relay on its circuit board. | Shut off power to the dishwasher for 5 minutes. If the code resumes when you restore power, have a service technician check the wiring and components. If the wiring and components are in working order, replace the electronic control board. |
| 1-2 | Damaged or corrupted memory on control board. Incompatible software components inside microprocessor. | Shut off power to the dishwasher for 5 minutes. If the code resumes when you restore power, replace the electronic control board. |
| 2-1 | The electronic control board detected a stuck key on the control panel. | See if any keys work. If no keys work or the control panel is damaged, replace the electronic control panel. If the control panel works, the problem might be with the electronic control board. |
| 2-2 | The electronic control board detects no communication from the control panel. | See if any keys work. If no keys work or the control panel is damaged, replace the electronic control panel. If the control panel works, the problem might be with the electronic control board. |
| 3-1 | Either there’s a break in the wiring or the thermistor/OWI component failed. (The thermistor is the water temperature sensor, the OWI is the Optical Water Indicator that detects the amount of debris in the water.) | Shut off power to the dishwasher and then check the wiring for the thermistor/OWI circuit. If the circuit wiring is undamaged, replace the thermistor/OWI component. |
| 3-2 | The thermistor/OWI circuit is electrically shorted, (The thermistor is the water temperature sensor, the OWI is the Optical Water Indicator that detects the amount of debris in the water.) | Shut off power to the dishwasher and then check the wiring for the thermistor/OWI circuit. If the circuit wiring is undamaged, replace the thermistor/OWI component. |
| 3-3 | OWI fails (the OWI is the Optical Water Indicator that detects the amount of debris in the water) | Shut off power to the dishwasher and clean the OWI. If the code resumes when you restore power, replace the OWI |
| 4-1 | No communication between the electornic control board and the wash pump motor | Shut off power to the dishwasher and then check the wiring from the control board to the wash pump motor. If the wiring is undamaged, replace the wash pump. If the problem persists, replace the electronic control board. |
| 4-2 | Communication error between the electronic control board and the wash pump motor | Shut off power to the dishwasher and then check the wiring from the control board to the wash pump motor. If the wiring is undamaged, replace the wash pump. If the problem persists, replace the electronic control board. |
| 5-1 | Door won’t latch shut | Press the Start button and immediately close the door. If the code continues, shut off power to the dishwasher and check the door latch mechanism and the wiring attached to the door switch. If the latch mechanism and the wiring are intact, replace the door switch. |
| 5-2 | Door won’t open | Check the wiring in the door switch. If the wiring is undamaged, replace the door switch. |
| 6-1 | The electronic control board doesn’t detect water entering the dishwasher tub. | Shut off power and then water to the dishwasher. Check the water supply for proper flow and pressure. Check the wiring to the water inlet valve. If the wiring and the water supply are in working order, replace the water inlet valve. |
| 6-2 | Water inlet valve has an electrical problem. | Shut off power and then water to the dishwasher. Check the water supply for proper flow and pressure. Check the wiring to the water inlet valve. If the wiring and the water supply are in working order, replace the water inlet valve. If the problem continues, replace the electronic control board. |
| 6-3 | Suds or air are in the water pump | Check the water fill level and check for suds in the fill water at the bottom of the tub. if the fill level is too low, replace the water inlet valve. If there’s excessive sudsing, check the detergent dispenser and replace if it’s damaged |
| 6-4 | The float switch is open | Check the overfill float switch to see if it’s stuck or if an item is stuck under it. Check if the inlet water fill valve is properly shutting off the water supply when the dishwasher is off. |
| 6-6 | Incoming water is too cold | Use an accurate thermometer to check the water temperature. If it’s lower than 110 degrees F, check your water heater. If the water temperature is normal (110 to 120 degrees F), replace the thermistor/OWI or the electronic control board. Refer to the tech sheet for your dishwasher for a diagnostic test for the thermistor. |
| 6-7 | Disconnected or damaged flow meter | Shut off power to the dishwasher. Check the wiring to the flow meter. If the wiring is intact, replace the flow meter. |
| 6-8 | Problem with water softener regeneration valve | Shut off power to the dishwasher. Check the wiring to the water softener regeneration valve. If the wiring is intact, replace the water softener regeneration valve. |
| 7-1 | Heating element doesn’t work | Shut off power to the dishwasher. Inspect the heating element and replace it if it’s visibly damaged. If not, check the wiring to the heating element. If the wiring is intact, replace the heating element. |
| 7-2 | Heating element won’t shut off | Shut off power to the dishwasher for 5 minutes. If the code resumes when you restore power, replace the electronic control board. |
| 8-1 | Slow drain | Shut off power to the dishwasher and then shut off water. Check the drain path for an obstruction. If the drain path is clear, check the wiring on the drain pump. If the wiring is intact, replace the drain pump. |
| 8-2 | Drain pump electrical problem | Shut off power to the dishwasher and then shut off water. Check the wiring on the drain pump. If the wiring is intact, replace the drain pump. |
| 9-1 | Electronic control board can’t detect the position of the diverter | The diverter directs the water through the lower spray arm or the upper spray arm. Turn off power to the dishwasher and then check the wiring going to the diverter motor. If the wiring is intact, replace the diverter. |
| 9-2 | Diverter is stuck on | Remove the lower dishrack and the lower spray arm. Disassemble the sump. Check the diverter disk and replace if visibly damaged. |
| 10-1 | Dispenser electrical problem | Shut off power to the dishwasher. Remove the outer door panel and check the wiring in the detergent dispenser circuit. If the wiring is intact, replace the detergent dispenser. |
| 10-2 | Vent wax motor electrical problem | Shut off power to the dishwasher. Check the wiring in the vent wax motor circuit. If the wiring is intact, replace the vent wax motor. |
| 10-3 | Drying fan problem | Shut off power to the dishwasher. Check the wiring in the drying fan circuit. If the wiring is intact, replace the drying fan. |
These error code explanations can help you diagnose a problem with your Kenmore Global HE dishwasher.
| Error Code | Condition | Check/Repair | Shop Parts |
| 1-1 | The electronic control board detects a stuck relay on its circuit board. | Shut off power to the dishwasher for 5 minutes. If the code resumes when you restore power, have a service technician check the wiring and components. If the wiring and components are in working order, replace the electronic control board. |
Electronic control board |
| 1-2 | Damaged or corrupted memory on control board. Incompatible software components inside microprocessor. | Shut off power to the dishwasher for 5 minutes. If the code resumes when you restore power, replace the electronic control board. | Electronic control board |
| 2-1 | The electronic control board detected a stuck key on the control panel. | See if any keys work. If no keys work or the control panel is damaged, replace the electronic control panel. If the control panel works, the problem might be with the electronic control board. | Control panel, Electronic control board |
| 2-2 | The electronic control board detects no communication from the control panel. | See if any keys work. If no keys work or the control panel is damaged, replace the electronic control panel. If the control panel works, the problem might be with the electronic control board. | Control panel, Electronic control board |
| 3-1 | Either there’s a break in the wiring or the thermistor/OWI component failed. (The thermistor is the water temperature sensor, the OWI is the Optical Water Indicator that detects the amount of debris in the water.) | Shut off power to the dishwasher and then check the wiring for the thermistor/OWI circuit. If the circuit wiring is undamaged, replace the thermistor/OWI component. | Thermistor/OWI, Wire harness |
| 3-2 | The thermistor/OWI circuit is electrically shorted, (The thermistor is the water temperature sensor, the OWI is the Optical Water Indicator that detects the amount of debris in the water.) | Shut off power to the dishwasher and then check the wiring for the thermistor/OWI circuit. If the circuit wiring is undamaged, replace the thermistor/OWI component. | Thermistor/OWI, Wire harness |
| 3-3 | OWI fails (the OWI is the Optical Water Indicator that detects the amount of debris in the water) | Shut off power to the dishwasher and clean the OWI. If the code resumes when you restore power, replace the thermistor/OWI component. | Thermistor/OWI |
| 4-4 | The electronic control board detects no circulation pump motor operation | Shut off power to the dishwasher. Check all wiring connections in the motor circuit. Reconnect any loose wires. Replace the wire harness if damaged. If the wiring connections are okay, replace the circulation pump motor. |
Wire harness, circulation pump motor |
| 5-1 | Door won’t latch shut | Press the Start button and immediately close the door. If the code continues, shut off power to the dishwasher and check the door latch mechanism and the wiring attached to the door switch. If the latch mechanism and the wiring are intact, replace the door switch. | Door switch, Door latch assembly |
| 5-2 | Door won’t open | Check the wiring in the door switch. If the wiring is undamaged, replace the door switch. | Door switch, Door latch assembly |
| 6-1 | The electronic control board doesn’t detect water entering the dishwasher tub. | Shut off power and then water to the dishwasher. Check the water supply for proper flow and pressure. Check the wiring to the water inlet valve. If the wiring and the water supply are in working order, replace the water inlet valve. | Water inlet valve |
| 6-2 | Water inlet valve has an electrical problem. | Shut off power and then water to the dishwasher. Check the water supply for proper flow and pressure. Check the wiring to the water inlet valve. If the wiring and the water supply are in working order, replace the water inlet valve. If the problem continues, replace the electronic control board. | Water inlet valve, Electronic control board |
| 6-3 | Suds or air are in the water pump | Check the water fill level and check for suds in the fill water at the bottom of the tub. if the fill level is too low, replace the water inlet valve. If there’s excessive sudsing, check the detergent dispenser and replace if it’s damaged | Water inlet valve, Detergent dispenser |
| 6-4 | The float switch is open | Check the overfill float switch to see if it’s stuck or if an item is stuck under it. Check if the inlet water fill valve is properly shutting off the water supply when the dishwasher is off. |
Water inlet valve, Overfill float switch |
| 6-6 | Incoming water is too cold | Use an accurate thermometer to check the water temperature. If it’s lower than 110 degrees F, check your water heater. water heater. If the water temperature is normal (110 to 120 degrees F), replace the thermistor/OWI or the electronic control board. Refer to the tech sheet for your dishwasher for a diagnostic test for the thermistor. | Thermistor/OWI, Electronic control board |
| 7-1 | Heating element doesn’t work | Shut off power to the dishwasher. Inspect the heating element and replace it if it’s visibly damaged. If not, check the wiring to the heating element. If the wiring is intact, replace the heating element. | Heating element |
| 7-2 | Heating element won’t shut off | Shut off power to the dishwasher for 5 minutes. If the code resumes when you restore power, replace the electronic control board. | Electronic control board |
| 8-1 | Slow drain | Shut off power to the dishwasher and then shut off water. Check the drain path for an obstruction. If the drain path is clear, check the wiring on the drain pump. If the wiring is intact, replace the drain pump. | Drain pump |
| 8-2 | Drain pump electrical problem | Shut off power to the dishwasher and then shut off water. Check the wiring on the drain pump. If the wiring is intact, replace the drain pump. | Drain pump |
| 9-1 | Electronic control board can’t detect the position of the diverter | The diverter directs the water through the lower spray arm or the upper spray arm. Turn off power to the dishwasher and then check the wiring going to the diverter motor. If the wiring is intact, replace the diverter. | Diverter |
| 9-2 | Diverter is stuck on | Remove the lower dishrack and the lower spray arm. Disassemble the sump. Check the diverter disk and replace if visibly damaged. | Diverter disk |
| 9-3 | Diverter disk is missing | Remove the lower dishrack and the lower spray arm. Disassemble the sump. Check to see if the diverter disk is missing. If the disc is missing, install a new disk. | Diverter disk |
| 9-4 | Lower spray arm error | Check for obstructions blocking the lower spray arm from turning. Shut off power to the dishwasher and check the wiring connections on the lower spray arm motor. If the wiring is intact, replace the lower spray arm motor. | Lower spray arm motor |
| 10-1 | Dispenser electrical problem | Shut off power to the dishwasher. Remove the outer door panel and check the wiring in the detergent dispenser circuit. If the wiring is intact, replace the detergent dispenser. | Detergent dispenser |
| 10-2 | Vent wax motor electrical problem | Shut off power to the dishwasher. Check the wiring in the vent wax motor circuit. If the wiring is intact, replace the vent wax motor. | Vent wax motor |
| 10-3 | Drying fan problem | Shut off power to the dishwasher. Check the wiring in the drying fan circuit. If the wiring is intact, replace the drying fan. | Drying fan |
These error code explanations can help you diagnose a problem with your Kenmore MicroClean HE dishwasher.
| Error Code | Condition | Check/Repair | Shop Parts |
| 1-1 | Stuck relay on the electronic control board | Shut off power to the dishwasher for 5 minutes. If the code resumes when you restore power, check the wiring connected to the control board for damage and repair any broken wires. Measure the resistance through all components connected to the control board using the tech sheet as a guide. You can find the tech sheet behind the bottom front toe panel of the dishwasher. Replace any defective components. If the wiring and components are okay, replace the electronic control board. | Electronic control board, wiring harness |
| 1-2 | Defective electronic control board | Shut off power to the dishwasher for 5 minutes. If the code resumes when you restore power, replace the electronic control board. | Electronic control board |
| 2-1 | Stuck button on the user interface control | Check all buttons on the user interface control for a response. If one or more of the buttons don’t work, unplug the dishwasher to disconnect electrical power and disconnect the user interface control wire harness. Reassemble the door with the user interface wire harness disconnected, but don’t close the door. Plug in the dishwasher and wait at least 7 seconds for the electronic control board to power up completely. Then close the door. If the electronic control no longer detects stuck buttons with the user interface wire harness unplugged, it will start the drain pump. If the drain pump runs, replace the user interface control. If the drain pump doesn’t run, then replace the electronic control board because it still detects stuck buttons with the user interface control unplugged. | User interface control, electronic control board |
| 3-1 | Thermistor/OWI sensor failure (The thermistor is the water temperature sensor, the OWI sensor is the Optical Water Indicator that detects the amount of debris in the water.) | Unplug the dishwasher to disconnect electrical power and then check the wiring between the electronic control board and the thermistor/OWI sensor. Repair or replace the wire harness if broken. If you find the wiring undamaged, replace the thermistor/OWI sensor. | Thermistor/OWI sensor, wire harness |
| 3-2 | Shorted thermistor/OWI sensor | Unplug the dishwasher to disconnect electrical power and then check the wiring between the electronic control board and the thermistor/OWI sensor. Repair or replace the wire harness if broken. If you find the wiring undamaged, replace the thermistor/OWI sensor. | Thermistor/OWI sensor, wire harness |
| 3-3 | OWI failed to calibrate or the drain hose check valve failed, allowing dirty water to backflow into the dishwasher | Disconnect the dishwasher drain hose connection from the air gap or the garbage disposal if you have no air gap. Pour water through the drain hose to see if water backs up into the dishwasher tub. If so, replace the portion of the drain hose that connects to the drain pump because the check valve in that hose failed. If water doesn’t back up into the dishwasher through the drain hose, reconnect the hose and run the Service Diagnostics Test according to the instructions in the tech sheet. You should see low soil level indicated during the OWI test in the diagnostic mode. If you see high soil level during the OWI test, unplug the dishwasher and clean the OWI sensor. Reassemble the dishwasher and plug the dishwasher back in to restore electrical power. Run the diagnostic test cycle so the electronic control board will calibrate the OWI sensor on the next cycle. Run a normal wash cycle. If you still see the error code, replace the thermistor/OWI sensor. | Thermistor/OWI |
| 4-4 | Circulation pump won’t run | Unplug the dishwasher to disconnect electrical power. Check the circulation pump wire harness and reconnect any loose wires or replace the wire harness if damaged. If the wiring connections are okay, replace the circulation pump and motor assembly. | Circulation pump and motor assembly, wire harness |
| 5-1 | Door switch failure | This code appears if you don’t close the door within 4 seconds of pressing the Start/Resume button, or if the door latch assembly is broken. When starting a cycle, close the door within 4 seconds after pressing Start/Resume. If you can’t start the cycle and the code continues, then the door switch could be defective. Unplug the dishwasher to disconnect electrical power. Disassemble the door and check the door switch wire harness. Reconnect any loose wires or replace the wire harness if damaged. If the wire harness is okay, replace the door latch assembly. | Door latch assembly, wire harness |
| 5-2 | Control detects door not opening | The electronic control board expects to see the door open between cycles or the dishwasher won’t start the next time you try to start a new cycle. If you didn’t open the door between cycles, cancel the cycle. Open and shut the door, and then start a new cycle. If the cycle still won’t start, then the door switch could be defective. Unplug the dishwasher, then plug it back in to simulate the door opening. If the cycle starts, replace the door latch assembly because the door switch isn’t detecting the door opening. | Door latch assembly |
| 6-1 | Won’t fill | Check for an item stuck under the overfill float and remove it. If the overfill float sticks in the “up” position the dishwasher won’t fill. Unplug the dishwasher to disconnect electrical power and shut the water supply valve. Disconnect the water supply line from the water inlet valve and check the water inlet valve screen for clogs. Replace the water valve if you find the screen clogged because debris from the clog can get into the valve body, causing the valve to stick open and possibly flood your kitchen. If the screen is clear, place the end of the water supply line in a shallow pan and briefly open the water supply valve to see if water flows from the supply line. If water doesn’t flow, have a plumber repair the water supply to your dishwasher. If the water flows okay, check the wiring connections on the water inlet valve and reconnect any loose wires or replace the wire harness if damaged. If the wires are okay, you may need to replace the water inlet valve or the electronic control board. | Water inlet valve, wire harness, electronic control board |
| 6-2 | Water inlet valve failure | Unplug the dishwasher to disconnect electrical power. Remove the bottom front access panel and toe panel. Check the wire harness connections on the water inlet valve. Reconnect any loose wires. Replace the wire harness if damaged. If the wire harness connections are okay, check the resistance of the water inlet valve using a multimeter. You should measure around 1,400 ohms of resistance through the water inlet valve. If you measure infinite resistance, replace the water inlet valve. | Water inlet valve, electronic control board, wire harness |
| 6-3 | Suds or air are in the water pump | Check for sudsy water. If you see excessive suds, try to drain the dishwasher by cancelling the cycle. The drain pump will run for 3 minutes. If the drain pump can’t drain the sudsy water, drain the water by hand or use a wet/dry shop vacuum to remove the water. Use only dishwasher detergent in the dishwasher. Using regular dish soap in the dishwasher causes excessive suds. If you don’t see excessive suds, check the water fill level in the tub because low water level causes air in the pump. The water level should just touch the bottom of the overfill float mushroom. If you find the water level too low, check for bowls or containers that flipped over during the cycle that could be holding water. Load items so they don’t flip over during the cycle and cause low water level. If you didn’t find bowls or containers flipped over and holding water, then a defective water inlet valve could cause the low water level. Unplug the dishwasher to disconnect electrical power and close the water supply valve. Disconnect the water supply line from the water inlet valve and check the water inlet valve screen for clogs. Replace the water valve if you find the screen clogged because debris from the clog can get into the valve body, causing the valve to stick open and possibly flood your kitchen. If the screen is clear, place the end of the water supply line in a shallow pan and briefly open the water supply valve to see if the water flows from the supply line. If water doesn’t flow, have a plumber repair the water supply to your dishwasher. If the water flows okay, check the wiring connections on the water inlet valve and reconnect any loose wires or replace the wire harness if damaged. If the wires are okay, you may need to replace the water inlet valve. | Water inlet valve, Wire harness |
| 6-4 | The float switch is open | Check for and remove any items stuck under the overfill float. A defective water inlet valve also can cause the float switch to trip open. If the water inlet valve sticks open, the dishwasher will fill constantly causing the float switch to trip. If this happens, replace the water inlet valve because the valve is stuck open. A third cause for the error code is a defective float switch. Unplug the dishwasher to disconnect electrical power and check the resistance through the overfill float switch. You should measure near 0 ohms of resistance with the dishwasher tub empty (or near empty). If you measure infinite resistance, replace the float switch. | Water inlet valve, overfill float switch |
| 7-1 | Heating element doesn’t work | Inspect the heating element and replace it if you find visible damage. If the heating element appears to be intact, unplug the dishwasher and check the wiring between the electronic control board and the heating element. Reconnect any loose wires or replace the wire harness if damaged. If the wiring is intact, replace the heating element. | Heating element, wiring harness |
| 7-2 | Heating element won’t shut off | Shut off power to the dishwasher for 5 minutes. If the code resumes when you restore power, replace the electronic control board. | Electronic control board |
| 8-1 | Slow drain | Unplug the dishwasher to disconnect electrical power. Check the drain path and remove any obstruction you find. If the drain path is clear, check the wiring between the drain pump and the electronic control board. Reconnect any loose wires or replace the wire harness if damaged. If the wiring is intact, replace the drain pump. | Drain pump, wiring harness |
| 8-2 | Drain pump electrical problem | Unplug the dishwasher to disconnect electrical power. Check the wiring between the drain pump and the electronic control board. Reconnect any loose wires or replace the wire harness if damaged. If the wiring is intact, replace the drain pump. | Drain pump, wire harness |
| 9-1 | Electronic control board can’t detect the position of the diverter disc | The diverter motor positions the disc that directs the water through the lower spray arm or the upper spray arm. The diverter motor also monitors the position of the diverter disc and sends position signals to the electronic control board. Unplug the dishwasher to disconnect power and check the wiring going to the diverter motor. Reconnect any loose wires or replace the wire harness if damaged. If the wiring is intact, replace the diverter motor because it isn’t sending position signals to the electronic control board. See the repair guide to fix it yourself. | Diverter motor, wiring harness |
| 9-2 | Diverter motor is stuck on | The diverter relay on the electronic control board is defective. Unplug the dishwasher to disconnect electrical power and replace the electronic control board. | Electronic control board |
| 9-3 | Diverter disc is missing | Remove the dishracks and the lower spray arm. Pull out the TurboZone manifold and the feed tube. Remove the pump outlet and check the diverter disc. Replace the disc if it’s broken or missing. | Diverter disc |
| 9-4 | Lower spray arm error | Check for and remove anything blocking the lower spray arm from turning. Unplug the dishwasher to disconnect power and check the wiring connections on the lower spray arm motor, which is a component on the diverter motor on this dishwasher. Reconnect any loose wires or replace the wire harness if damaged. If the wiring is intact, replace the diverter motor, which includes the lower spray arm motor. | Diverter motor, wire harness |
| 10-1 | Detergent dispenser failure | Unplug the dishwasher to disconnect electrical power. Remove the outer door panel and check the wiring connections between the electronic control board and the detergent dispenser. Reconnect any loose wires or replace the wire harness if damaged. If the wiring is intact, replace the detergent dispenser. | Detergent dispenser, wire harness |
| 10-3 | Drying fan failure | Unplug the dishwasher to disconnect electrical power. Check the wiring between the electronic control board and the drying fan. Reconnect any loose wires or replace the wire harness if damaged. If the wiring is intact, replace the drying fan. | Drying fan, wire harness |

